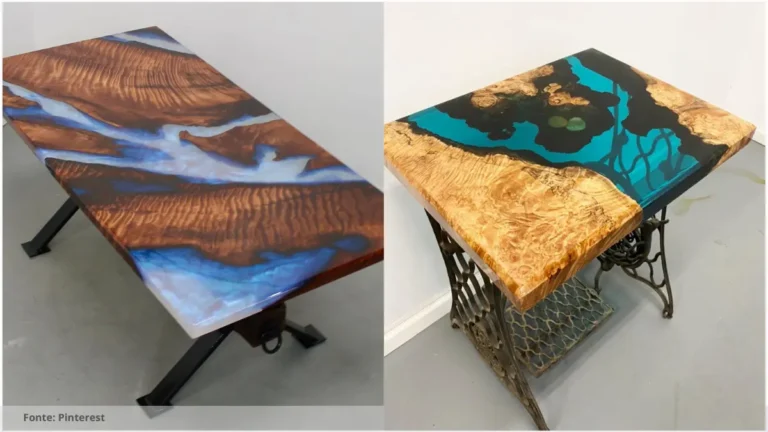
Epoxy Table Mold Guide: Tips and Tricks for Creating Stunning DIY Epoxy Tables
Epoxy Table Mold
Creating a stunning DIY epoxy table starts with choosing the right mold. An epoxy table mold is essential for shaping the design and ensuring the epoxy resin sets properly. There are various types of molds available, including silicone molds, wood molds, and plastic molds. When selecting a mold, consider the size and shape of the table you want to create. Make sure the mold is smooth and free of any imperfections that could affect the final look of the table.
Choosing the Right Epoxy Resin
The type of epoxy resin you use plays a crucial role in the outcome of your DIY epoxy table. There are different types of epoxy resins available, such as clear epoxy resin, colored epoxy resin, and UV-resistant epoxy resin. Clear epoxy resin is ideal for creating a transparent finish, while colored epoxy resin can add a pop of color to your table. UV-resistant epoxy resin is essential if your table will be exposed to sunlight to prevent yellowing or discoloration.

Preparing the Workspace
Before starting the epoxy table project, it is essential to prepare the workspace properly. Make sure the area is clean, well-ventilated, and free of dust and debris. Cover any surfaces you don’t want to get epoxy resin on, such as floors and countertops, with plastic or drop cloths. Wear protective gear, such as gloves and a mask, to protect yourself from the epoxy resin fumes and ensure proper ventilation in the room.
Mixing and Pouring the Epoxy Resin
Once you have selected the mold, epoxy resin, and prepared the workspace, it’s time to mix and pour the epoxy resin. Follow the manufacturer’s instructions carefully to ensure the resin sets properly. Mix the epoxy resin and hardener in the correct ratio and stir thoroughly to avoid any clumps or bubbles. Pour the resin into the mold slowly and evenly to prevent uneven surfaces or air bubbles. Use a heat gun or torch to remove any bubbles that may form during the pouring process.
Finishing Touches and Demolding
After pouring the epoxy resin into the mold, allow it to cure according to the manufacturer’s instructions. Once the resin has hardened, remove the table from the mold carefully. Sand down any rough edges or imperfections with sandpaper and finish with a coat of sealer or polish to give your DIY epoxy table a glossy finish. Add any additional decorative elements, such as wood inserts or metal accents, to personalize your table and make it truly unique.
In conclusion, creating a stunning DIY epoxy table requires careful planning, preparation, and attention to detail. By following this epoxy table mold guide, you can create a beautiful and durable table that will be the focal point of any room. Experiment with different molds, epoxy resins, and finishing techniques to unleash your creativity and design a one-of-a-kind piece of furniture that reflects your personal style.
Read the Recent Articles of the Day by Clicking Here!
When creating DIY epoxy tables, it is important to pay close attention to the epoxy table mold guide to ensure the best results. One important suggestion is to thoroughly clean and prepare the mold before pouring the epoxy. This will help prevent any dust, dirt, or debris from getting trapped in the epoxy, which can affect the final outcome of the table. Additionally, make sure to use a high-quality release agent on the mold to prevent the epoxy from sticking and ruining the mold. Taking these precautions will help ensure a smooth and stunning finish on your DIY epoxy table.

Frequently Asked Questions: Epoxy table mold
What materials do I need to create an epoxy table?
To create an epoxy table, you will need a wooden table surface, epoxy resin, hardener, mixing cups, stirring sticks, gloves, and a torch for removing air bubbles.
How can I prevent air bubbles from forming in epoxy?
To prevent air bubbles from forming in epoxy, you can mix the epoxy slowly and thoroughly, apply it in thin layers, use a heat gun to pop any bubbles, and work in a warm environment.
What is the best way to remove epoxy from molds?
The best way to remove epoxy from molds is by using a heat gun or applying acetone to soften the epoxy and then gently scraping it off the mold.
Can I add color to my epoxy table?
Yes, you can add color to your epoxy table by using epoxy resin pigments or dyes. These can be mixed in before pouring to achieve your desired color.
So, what do you think about this subject? Share your opinion in the comments and let’s continue discussing together!