Step-by-Step Guide to Creating Stunning DIY Furniture with Epoxy Resin
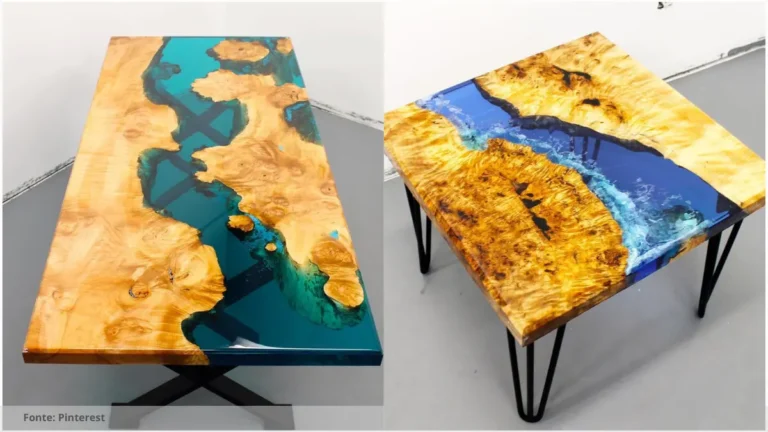
Epoxy resin is a versatile and durable material that can be used to create stunning furniture pieces, such as tables, countertops, and more. It is a liquid substance that, when mixed with a hardener, cures into a solid and glossy finish. Epoxy resin is known for its high durability, resistance to scratches and water, and ability to create beautiful, one-of-a-kind designs. Creating an epoxy resin table is a fun and rewarding DIY project that can be done by beginners and experienced crafters alike. Follow this step-by-step guide to create your own stunning piece of furniture. Before starting your project, gather the following materials: epoxy resin, hardener, silicone molds, mixing cups, stirring sticks, heat gun, gloves, and a table base. Start by preparing your workspace. Make sure the area is well-ventilated and free of dust and debris. Cover your work surface with plastic or cardboard to protect it from spills and drips. Follow the instructions on the epoxy resin packaging to mix the resin and hardener together in a mixing cup. Stir the mixture thoroughly, making sure to scrape the sides and bottom of the cup to ensure all the resin is fully mixed. Once the epoxy resin is fully mixed, pour it into the silicone molds or directly onto your table base. Use a heat gun to remove any air bubbles that may have formed during the mixing process. Allow the resin to cure according to the instructions on the packaging. By following this step-by-step guide, you can create your own stunning epoxy resin table that will be a unique and eye-catching addition to your home décor. Enjoy the process of creating your own custom furniture piece and show off your creativity with a beautiful epoxy resin table. Read the Recent Articles of the Day by Clicking Here! One important suggestion when creating an epoxy resin table is to properly prepare and seal the wood surface before adding the resin. This will help prevent any air bubbles or uneven finish in the final product. Sand down the wood surface to remove any rough spots or imperfections, then apply a sealant or primer to ensure a smooth and even finish. This extra step will result in a stunning and professional-looking DIY furniture piece. To create an epoxy resin table, you will need epoxy resin, hardener, a mixing container, a stirring stick, a table mold, color pigments, protective gear, and a heat gun. To prep your table surface for epoxy resin, make sure it is clean, smooth, and level. Sand any imperfections, wipe it down with a degreaser, and apply a primer if needed. Yes, you can customize the color and design of your table by choosing different finishes, materials, and styles to create a unique look that suits your preferences. Regularly clean and disinfect the table surface, use coasters under glasses and hot dishes, avoid placing heavy objects directly on the table, and apply a protective sealant to prevent damage. So, what do you think about this subject? Share your opinion in the comments and let’s continue discussing together!Epoxy Resin Table Tutorial
Materials Needed
Preparing the Workspace
Mixing the Epoxy Resin
Pouring and Curing

Frequently Asked Questions: Epoxy resin table tutorial
What materials do I need to create an epoxy resin table?
How do I prep my table surface for epoxy resin?
Can I customize the color and design of my table?
What are the best practices for curing and protecting the table?
Read more Contents: