How to Epoxy Table
Choosing the Right Table
When embarking on the journey of creating your own epoxy table, it’s important to start with a suitable base. Make sure to choose a table that is sturdy and has a smooth surface to work on.
Gathering Materials and Tools
Before you begin the epoxy process, gather all the necessary materials and tools. This includes epoxy resin, hardener, measuring cups, stirring sticks, gloves, and a blowtorch for removing air bubbles.

Preparing the Work Area
To ensure a successful epoxy application, it’s crucial to prepare your work area properly. Cover the surrounding area with plastic or cardboard to protect it from any spills or drips.
Mixing the Epoxy
In a clean measuring cup, carefully measure out the epoxy resin and hardener according to the manufacturer’s instructions. Use a stirring stick to thoroughly mix the two components until they are fully combined.
Applying the Epoxy
Pour the epoxy mixture onto the table surface in a zig-zag pattern to ensure even coverage. Use a spreader or brush to coat the entire surface, making sure to spread the epoxy evenly and smoothly.
Curing and Finishing
After applying the epoxy, use a blowtorch to remove any air bubbles that may have formed. Allow the epoxy to cure according to the manufacturer’s instructions. Once fully cured, sand down any rough edges and apply a final coat of epoxy for a glossy finish.
Enjoying Your Epoxy Table
Congratulations, you have successfully created a stunning epoxy table! Now, sit back and admire your handiwork as you enjoy your new piece of furniture. Show it off to friends and family, and bask in the satisfaction of completing a beautiful DIY project.
Read the Recent Articles of the Day by Clicking Here!
One important suggestion for creating an epoxy table is to thoroughly clean and prepare the surface before beginning the epoxy application. This will help ensure a smooth and even finish that will last for years to come. Here is a step-by-step guide for a stunning DIY epoxy table project:
Step 1: Choose the right table top – Select a table top that is smooth and flat, as any imperfections in the surface will be magnified once the epoxy is applied.
Step 2: Prepare the work area – Make sure you have a clean, well-ventilated space to work in, as epoxy can produce strong fumes. Lay down a drop cloth or newspaper to protect the surrounding area.
Step 3: Sand the table top – Use sandpaper to smooth out any rough spots or imperfections on the table top. Wipe down the surface with a damp cloth to remove any dust.
Step 4: Seal any cracks or knots – If your table top has any cracks or knots, use wood filler to seal them. Allow the filler to dry completely before moving on to the next step.
Step 5: Mix the epoxy – Follow the manufacturer’s instructions to mix the epoxy resin and hardener together. Stir slowly and thoroughly to avoid creating bubbles in the mixture.
Step 6: Apply the epoxy – Pour the epoxy mixture onto the table top, using a foam brush or squeegee to spread it evenly over the surface. Work quickly to avoid the epoxy drying before you finish applying it.
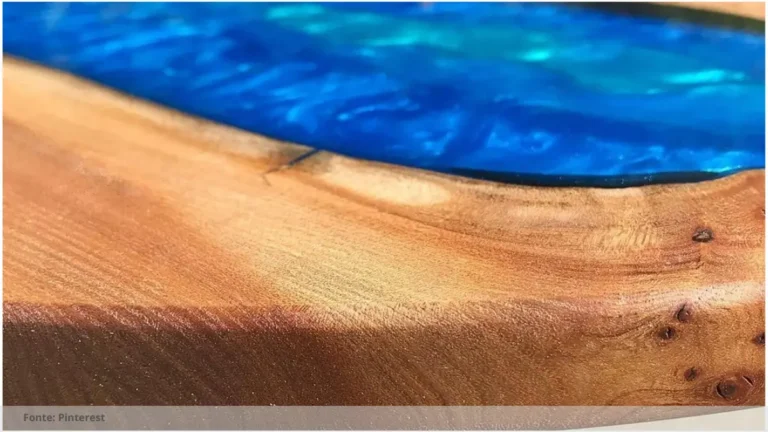
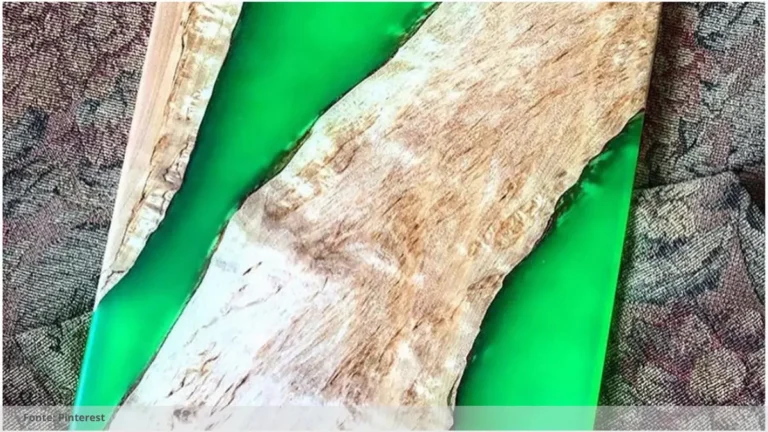
Step 7: Add any desired colors or effects – If you want to add color or other effects to your epoxy table, now is the time to do so. Use a brush or stick to create swirls, marbling, or any other desired designs.
Step 8: Let the epoxy cure – Allow the epoxy to cure according to the manufacturer’s instructions. This typically takes 24-48 hours, but may vary depending on the specific product you are using.
Step 9: Sand and seal the table – Once the epoxy has cured, use fine-grit sandpaper to smooth out any rough spots or imperfections. Apply a coat of polyurethane or another sealant to protect the epoxy and give the table a glossy finish.
Following these steps will help you create a stunning epoxy table that will be a beautiful and durable addition to your home. Experiment with different colors, effects, and techniques to make your table truly unique and one-of-a-kind.

Frequently Asked Questions: How to epoxy table
What materials do I need for an epoxy table project?
For an epoxy table project, you will need epoxy resin, a wooden table top, pigment powders or dyes, gloves, mixing cups, stirring sticks, and a heat gun or torch.
How do I properly mix and apply the epoxy resin?
First, make sure to follow the manufacturer’s instructions for mixing ratios and application techniques. Ensure the surfaces are clean and prepped before mixing and apply in a well-ventilated area.
How long does it take for the epoxy to cure?
The curing time for epoxy can vary depending on the type and brand, but typically it takes 24-72 hours to fully cure and achieve maximum strength.
Can I sand and polish the epoxy for a smooth finish?
Yes, you can sand and polish epoxy to achieve a smooth finish. Use a fine-grit sandpaper to sand the surface and then polish with a polishing compound for best results.
So, what do you think about this subject? Share your opinion in the comments and let’s continue discussing together!