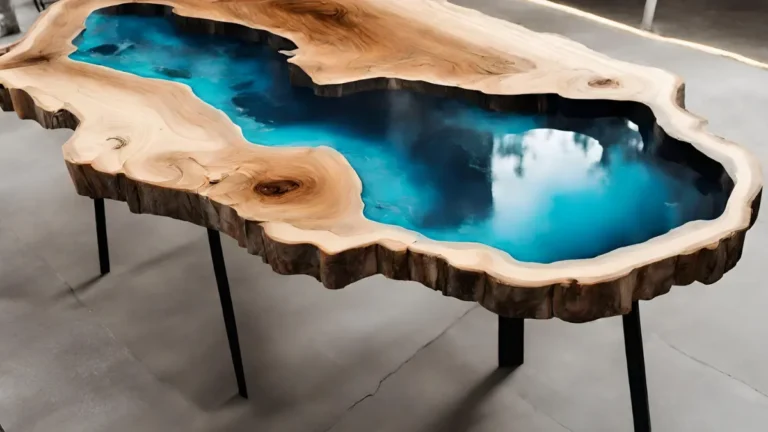
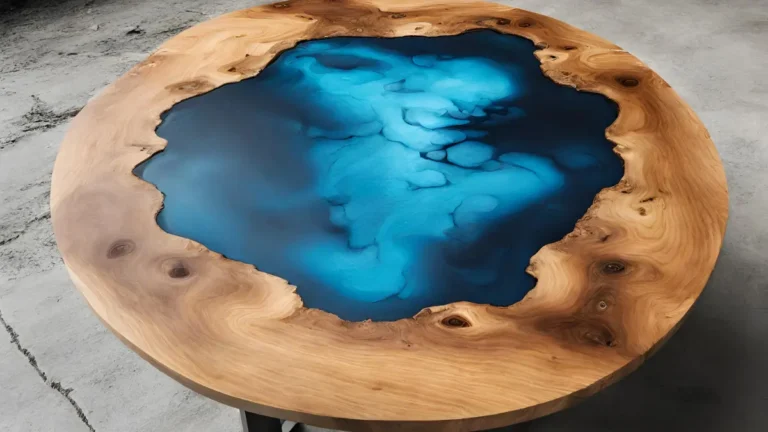
How to Resin Table
Resin furniture has become increasingly popular in recent years, thanks to its unique look and durability. One of the most common DIY projects involving resin is creating a stunning resin table. Whether you’re a beginner or an experienced crafter, this step-by-step guide will help you bring your resin table vision to life.
Gather Your Materials
Before you can begin creating your resin table, you’ll need to gather all the necessary materials. This includes a wooden table, resin epoxy, resin pigments, mixing cups, stirring sticks, and a torch for removing air bubbles.

Prepare Your Work Area
It’s essential to set up a clean and well-ventilated work area before starting your resin table project. Lay down a drop cloth to protect your work surface and ensure that the area is free of dust and debris that could potentially ruin your finished product.
Mix the Resin
Once your work area is ready, it’s time to mix the resin. Follow the instructions on the resin epoxy packaging carefully to ensure that you achieve the right consistency. Add resin pigments to create the desired color for your table, mixing thoroughly to avoid any streaks or clumps.
Pour the Resin
Now comes the fun part – pouring the resin onto your table. Use a clean stirring stick to spread the resin evenly across the surface, covering any imperfections or cracks in the wood. Work quickly to avoid the resin drying before you’re finished.
Remove Air Bubbles
After pouring the resin, it’s crucial to remove any air bubbles that may have formed. Use a torch to carefully pass over the surface of the resin, popping any bubbles that are trapped underneath. This step will ensure a smooth and polished finish for your resin table.
Let It Cure
Finally, allow your resin table to cure according to the manufacturer’s instructions. This process can take anywhere from to hours, depending on the type of resin you used. Once fully cured, your stunning resin table will be ready to showcase in your home.
With this step-by-step guide, creating a resin table has never been easier. Follow these tips and tricks to bring your vision to life and enjoy a unique piece of furniture that will impress friends and family alike.
Read the Recent Articles of the Day by Clicking Here!
One important suggestion when working with resin to create a stunning resin table is to make sure you have a clean and well-ventilated workspace. Resin can be messy and has strong fumes, so it’s important to work in a well-ventilated area to avoid inhaling any harmful gases. Additionally, make sure to thoroughly clean and prep your table surface before applying the resin to ensure a smooth and even finish. Lastly, take your time and follow the manufacturer’s instructions carefully to ensure the best results.

Frequently Asked Questions: How to resin table
What materials do I need to resin a table?
To resin a table, you will need epoxy resin, a mixing container, stirring sticks, a heat gun or torch for bubbles, protective gloves, and a well-ventilated workspace.
Can I resin over a painted table surface?
Yes, you can resin over a painted table surface. Make sure the paint is fully cured and smooth before applying the resin to ensure a successful finish.
How do I prevent air bubbles in my resin?
To prevent air bubbles in resin, you can mix the resin slowly, use a heat source or torch to pop bubbles, pour the resin slowly, and work in a warm environment.
How long does it take for resin to fully cure?
The time it takes for resin to fully cure varies depending on the type of resin used, but typically ranges from 24 to 72 hours for complete curing.
So, what do you think about this subject? Share your opinion in the comments and let’s continue discussing together!